Review · KYOTO TOURS
Roketsu dyeing experience: M course Roketsu Dyeing Experience
Make a souvenir, not a souvenir shop stop. This Kyoto roket su dyeing class lets you draw and dye your own design, with the full process centered on bucket dyeing, not just watching. You get guided instruction in a real dye studio run by a family team, so it feels like you stepped into craft life, not a staged activity.
What I love most is the workshop energy. The instructors, including the owner and his mother Yoko, keep things gentle and unhurried, and the atmosphere is quiet and relaxing even when you are working with your hands. Second, the payoff is practical: you leave with something you can wear or hang right away, and the results are impressive even if you are not artistic.
One consideration: English support is limited. You will rely on demonstrations and hands-on help, and if you choose a more intricate design, your session can run longer than the typical 90 to 120 minutes.
In This Review
- Key things to know before you go
- A calm, hands-on break in Kyoto’s dye studio
- Finding Roketsu73 Nishikyōgoku Umazukachō and what to expect
- Choose your item: shirt, tote, or banner-style textile
- Design time: stencils, freehand sketches, and original art
- The roket su process, wax resist, and 100% bucket dyeing
- Step-by-step class flow, from practice cloth to finished piece
- Pace, group size, and why you will not feel rushed
- Price and value at about $25.77 per person
- Who this Kyoto craft experience fits best
- Should you book the Roketsu dyeing M course in Kyoto?
- FAQ
- How long does the Roketsu dyeing experience take?
- Can I take my dyed item home the same day?
- Do I need my own sketch to participate?
- What kinds of items can I dye?
- Will there be English instruction?
- What happens if weather is bad?
Key things to know before you go
- 100% bucket dyeing focus for a true roket su experience, not a watered-down demo
- Draw by yourself option, either with stencils or your own sketch ideas
- Family-run studio feel, with patient help from the owner and Yoko
- Take-home same day outcome, so the class doubles as your Kyoto souvenir
- Small-group setup (maximum 30) that makes it easier to get attention when needed
A calm, hands-on break in Kyoto’s dye studio
Kyoto can be a lot. Temples, crowds, and walking that never seems to end. This M course roket su experience is the kind of stop that resets your brain. Instead of collecting more sights, you create something.
The workshop is built around wax-resist dyeing and a bucket-dye step that is central to roket su style. The big difference, as you will quickly understand, is that you are not just doing a quick craft project. You are participating in the whole cycle, from design to dyeing, with enough structure that you are still guided even if your drawings are simple.
I also like how the studio experience is designed for comfort. People talk about a clean, well-equipped space and an ample studio feel, which matters. In a class like this, you want room to work, not a cramped corner where you feel awkward.
A few more Kyoto days to weigh up
- PERFECT KYOTO 1-Day Bus Tour
★ 5.0 · 13,518 reviews - Kyoto: Fushimi Inari, Kinkakuji, Bamboo Grove 1 Day Bus Tour
★ 4.8 · 4,316 reviews - Kyoto: Tea Ceremony in a Traditional Tea House in Kiyomizu
★ 4.9 · 3,519 reviews
Finding Roketsu73 Nishikyōgoku Umazukachō and what to expect
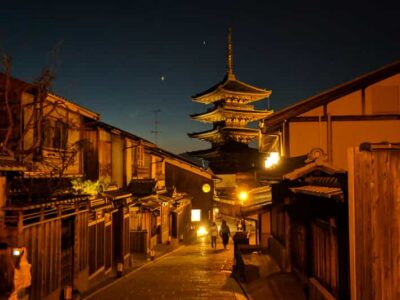
You meet at Roketsu73 Nishikyōgoku Umazukachō in Ukyo Ward, Kyoto. The location is not in the main tourist core, which is part of the charm. You feel the neighborhood, and it also means you should plan your transit so you arrive without stress.
The class runs with a mobile ticket, and the activity ends back at the meeting point. It is near public transportation, and service animals are allowed, so you should be able to fit it into a normal day without too much fuss.
Typical timing is about 90 to 120 minutes for the journey. One practical note: the class length can expand. If you take extra time on your drawing, you may stay closer to 2 to 3 hours. That is not a problem, just plan it like a proper activity, not a quick stop.
Choose your item: shirt, tote, or banner-style textile
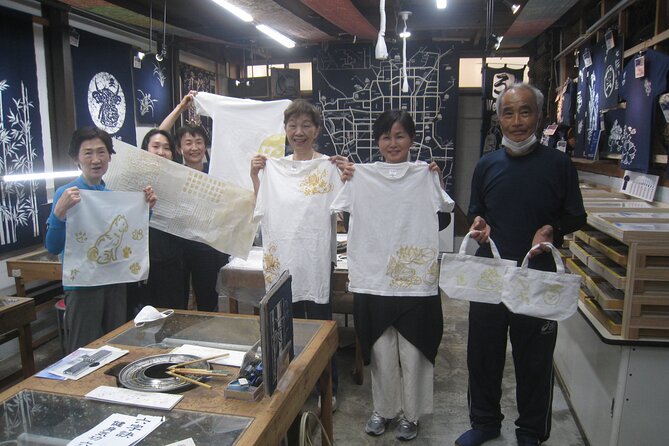
Before you touch wax or dye, you get to pick what you want to dye. The experience commonly includes items like t-shirts, tote bags, and banner-like fabric pieces.
Picking your item changes the whole feel of the class. A shirt gives you a wearable souvenir, and it also means your design needs to flow with the garment shape. A tote bag is great if you want a larger canvas and easy everyday use. A banner-style piece feels more like wall art, and you can choose bolder placement since it is not about fitting a body.
I like that you get to choose what you will actually keep. It reduces the chance of leaving with something you do not love. And since you are making it yourself, you will notice the quality more than you would with a store-bought item.
Design time: stencils, freehand sketches, and original art
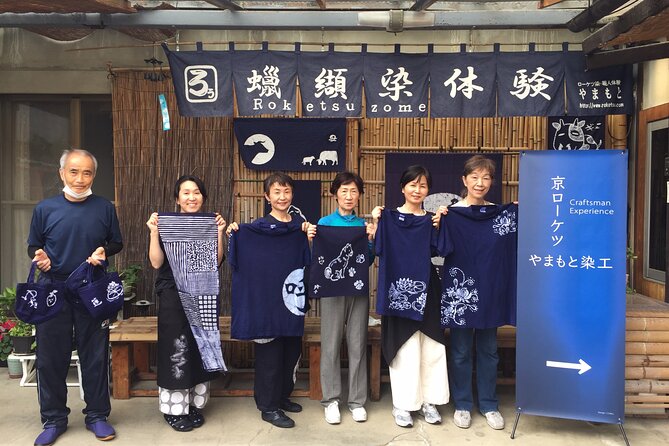
Roketsu starts with design. Here, you have two main paths. You can select from a large variety of designs and stencils, or you can draw your own idea. If you bring a sketch, the workshop can work with your original artwork, too.
What you will appreciate is how much control you get without needing professional drawing skills. People describe it as something you can do even if you feel unartistic. The guidance helps you translate your idea into something that works with the wax-resist method.
A tip that can save you time: if you pick a very detailed stencil or go freehand with lots of small elements, your session may stretch. That is not a downside, it is just a planning factor. If you want a more relaxed pace, start with a design with clear shapes and fewer tiny lines.
Also, do not treat this as a test of art ability. It is about learning the craft. Your finished piece will look like your style, even if your sketch is rough at the start.
A different sort of day in Japan:
- Kyoto Geisha Walking Tour: Gion District & Hidden Gems
★ 4.7 · 3,273 reviews - Kyoto: Tea Ceremony Ju-An at Jotokuji Temple
★ 4.9 · 3,207 reviews - Kyoto: 45-Minute Tea Ceremony Lesson Experience
★ 4.3 · 2,378 reviews - Kyoto: Gion Geisha District Walking Tour – Stories of Geisha
★ 4.7 · 2,187 reviews
The roket su process, wax resist, and 100% bucket dyeing
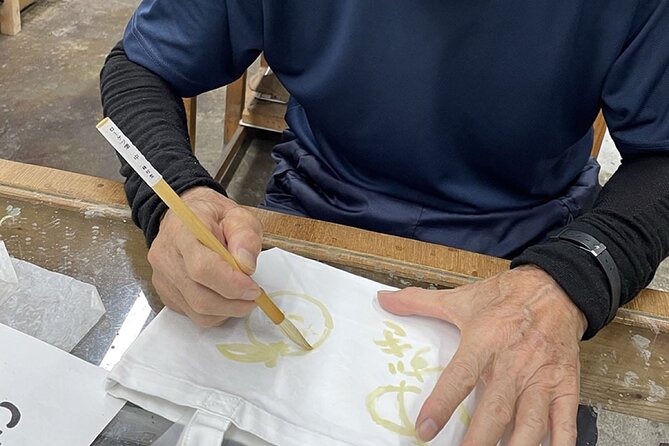
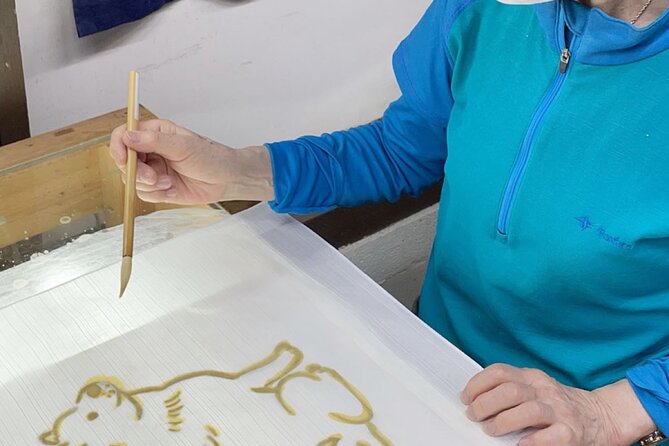
Roketsu is a wax resist technique, which means the wax acts like a barrier. Wherever the wax goes, the dye will be blocked there, creating contrast. You paint melted wax onto the fabric, and then the dyeing step happens in the bucket.
The class description emphasizes that this is the only workshop where you can experience 100% of bucket dyeing. In plain terms, that means you are not stuck watching someone else do the dye step. You stay part of the action through the process.
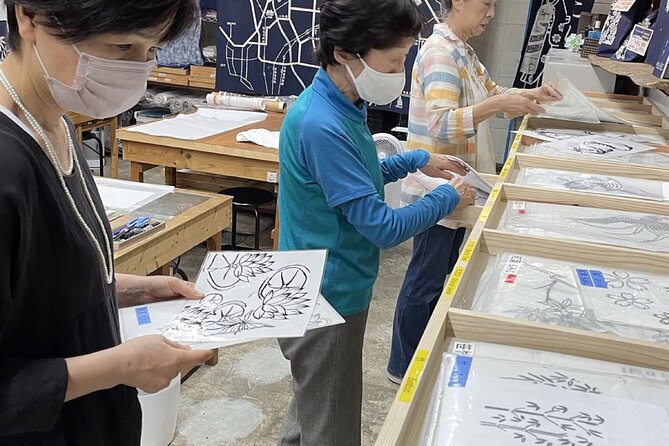
You will feel the method quickly: you practice a bit first, then you apply wax carefully according to your design. The wax looks different than paint, and it behaves differently, so the practice run is genuinely helpful. Even if your first attempt is imperfect, you will get the rhythm fast once you see how the wax lines translate into the final pattern.
Then comes the dyeing stage. Because it is bucket-based dyeing, the fabric and dye interact more directly, and that matters for how colors settle and how the resist pattern reads. Your final piece will look like craft work, not like a printed craft. That is the big value.
Step-by-step class flow, from practice cloth to finished piece
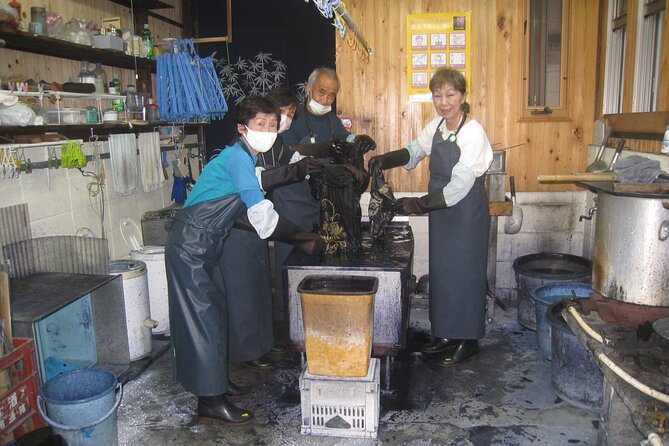
Most people want to know what they are doing for those 90 to 120 minutes. Here is the flow you can expect, in a practical way.
First, you start by choosing your item and deciding on your design. Whether you pick a stencil or use your own sketch, you will get guidance so your pattern makes sense for wax-resist results. If you are bringing your own drawing, keep it simple enough that it can be translated into wax lines.
Next, there is a practice run on a smaller piece of fabric. This is smart. It helps you understand how the wax application feels and how thick or thin lines can look. You also get a chance to adjust before you work on your real souvenir.
Then you move into the main phase: painting the melted wax onto your chosen textile. This is the hands-on moment people remember. You do the work. The instructors guide you with a calm, careful pace. Even if your English is limited, the demonstrations and step-by-step support make it manageable.
After the wax is applied, the dyeing is done as part of the craft process. Your design influences what resists the dye and what takes color. You end up with a finished item you can take home the same day, which is a huge bonus compared with many Japanese craft experiences where you mail it later.
Pace, group size, and why you will not feel rushed
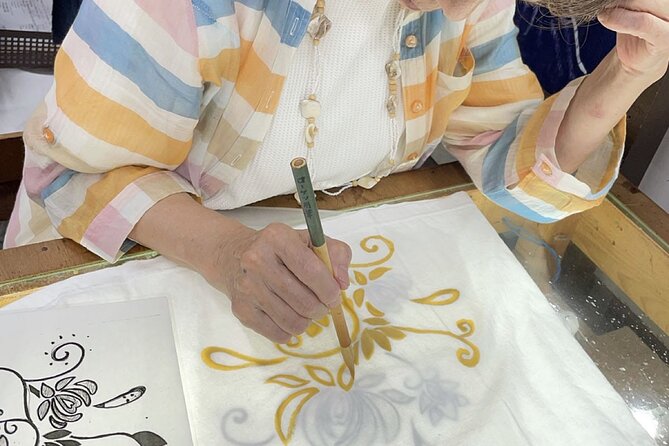
This is one of those activities where the tone matters as much as the technique. People consistently describe the instructors as kind, patient, and not rushed. That shows in the way the class is paced.
The group size cap is 30 travelers, which is fairly important. You want enough people that the studio is lively, but not so many that you feel like you disappear in the back. In this setup, you can ask questions and get help while you are working.
The most reliable theme in the experience is calm instruction. If you choose a complex design, you might spend longer than the suggested time. That can happen when you take time on your drawing or add intricate detail. The good part is that you are not pressured to speed up. You still get help and you still get to finish your piece.
One small reality check: you should expect that the instructors may speak limited English. Do not let that scare you off. The process is hands-on, and the way they show steps can communicate a lot. I would still go in with a flexible mindset, slow down, and let the craft teach you.
Price and value at about $25.77 per person
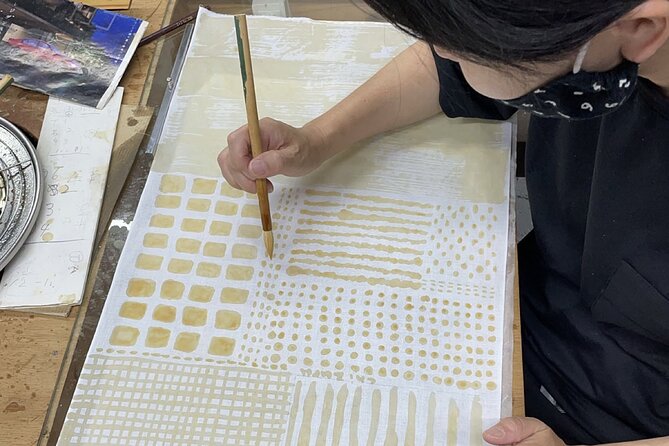
At $25.77 per person, this class sits in the “affordable craft day” category. But the value is more than the price number. You are paying for a complete technique experience in a real dye studio, plus the materials and the outcome.
What makes the value feel strong is the take-home result. Many activities are cheap but end with something you barely use. Here, the finished textile is designed to be worn or displayed. Even if you choose something simple, it becomes a souvenir you can actually see every time you use it.
You also get something emotional that is hard to price: you made it yourself. The wax resist method is visual and tactile. When you peel back the contrast and see your own lines and patterns, the result feels personal. People call it a highlight, and I get why. You are not just consuming culture, you are making it.
Finally, it supports a small, family-run business setting rather than a large corporate operation. Reviews mention that feel of a mom-and-pop studio, and you can sense it in the attention you get.
Who this Kyoto craft experience fits best
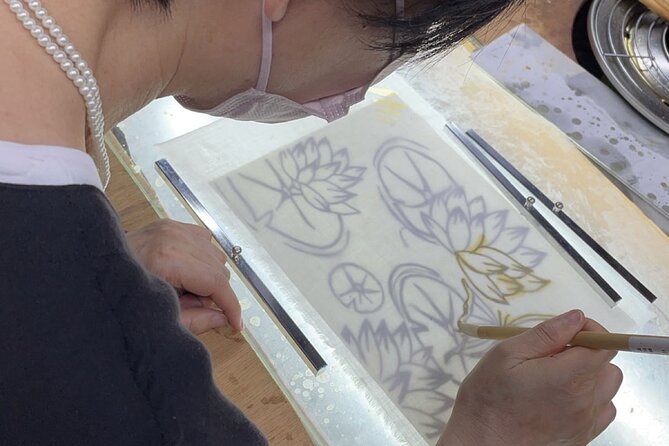
This workshop fits best if you want a break from sightseeing and you like hands-on activities. If your Kyoto plan is temple-heavy, this is a smart counterweight. It gives your feet a rest and your mind a quieter job.
You do not need special art skill. The class is structured so that most people can participate. The step-by-step guidance, practice run, and stencil options reduce the intimidation factor.
It is also a strong family activity. A group can craft together in the studio setting, and the atmosphere is described as soothing and therapeutic. Teens often like the hands-on control and the chance to make something original.
If you are traveling solo, it also works well. You are guided through steps without needing a partner to translate. The process is visual and practical, so you can focus even if you are a little nervous about drawing.
Your main “not for me” situation is if you need lots of spoken English and fast explanations. The workshop leans on demonstration. If you want a full-service, multi-language lecture, you might find the communication more challenging.
Should you book the Roketsu dyeing M course in Kyoto?
I think you should book this if you want a genuine Kyoto craft experience with a real technique and a take-home result. The combination of 100% bucket dyeing, hands-on wax resist work, and same-day souvenir makes it a high-impact use of time.
I would especially recommend it if you:
- want a relaxing activity with gentle instruction
- like the idea of making something personal, not buying another item
- are okay with limited English as long as the process is guided step-by-step
- have room in your day for 90 to 120 minutes, plus extra time if you go intricate
On the other hand, skip it if your schedule is ultra-tight and you cannot risk running longer than the suggested timing. Also skip if you strongly prefer a verbal-heavy experience with lots of English explanation.
If you can bring a calm attitude and let the craft guide you, this is the kind of Kyoto experience you will remember because you made it yourself.
FAQ
How long does the Roketsu dyeing experience take?
The full experience takes about 2 hours approximately, and the journey is listed as around 90 to 120 minutes. If you choose more intricate designs or take your time on drawing, it may take longer.
Can I take my dyed item home the same day?
Yes. The experience states that you can take your piece out on the day, and the workshop is described as allowing you to bring home a souvenir that same day.
Do I need my own sketch to participate?
No. You can select designs or stencils from what they provide, and the workshop also supports creating original work if you have your own sketch.
What kinds of items can I dye?
You can dye items such as t-shirts, tote bags, and banner-style fabric pieces.
Will there be English instruction?
Some English may be used, but support is limited. The instruction is mostly hands-on, using demonstrations and guidance through each step.
What happens if weather is bad?
The experience requires good weather. If it is canceled due to poor weather, you will be offered a different date or a full refund.
Newly listed around Kyoto
- SHIRAKAWA Japanese Culture Experiences with private English staff★ 5.0 · 16 reviews
- A Privately Guided Photoshoot in Beautiful Kyoto by a Pro★ 5.0 · 18 reviews
- Scenic Green Tea Fields of Hidden Kyoto & Local Tea Exp (Private)★ 5.0 · 32 reviews
- Pedal Adventure Kyoto’s iconic landmarks on an e-bike tour★ 5.0 · 189 reviews
- Kyoto: Geisha Dinner & Gion Cultural Walk★ 5.0 · 14 reviews
- Private departure transfer from Kyoto city to Osaka Itami International airport★ 4.5 · 33 reviews
- Kyoto tour with English Speaking Chauffeur★ 5.0 · 29 reviews
- Kyoto&Nara Private Highlights Tour with English driver Pickup★ 4.0 · 6 reviews
Kyoto Tours, compared.
Fushimi Inari, Kinkakuji, Bamboo Grove 1 Day Bus Tour
Read our review →
Tea Ceremony in a Traditional Tea House in Kiyomizu
Read our review →
Kyoto Geisha Walking Tour: Gion District & Hidden Gems
Read our review →
Gion Geisha District Walking Tour – Stories of Geisha
Read our review →